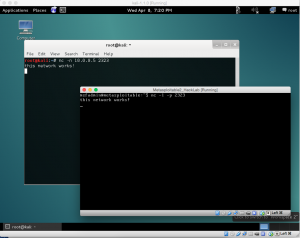
I’ve setup a lot of hacklabs at work and for personal use they started out as physical networks and migrated to virtualized networks. However I’ve always wanted to set one up on my mid-2012 MacBook Pro rather than the thinkpad, panasonic, or other laptop. I’ve always been a big fan of Apple’s hardware but in the virtualization world they seem to be lacking… VMware Fusion is no where near the functionality of VMware Workstation, and I prefer to have more granular control of my VM setup. VMware Fusion hacklabs I’ve setup in the past were fraught with issues, from isolated network setups, to VMs being corrupted on external HDDs. So instead I’ve reverted to a simpler method that “just works”. Here my setup now, with steps!
1. Download and install VirtualBox and Extension Pack. Vbox isn’t as polished as Fusion or Parallels but it has tons of features and support.
2. Install VMs into VirtualBox using ISOs. There is a ton of info out there on how to get ISOs, but I really like vulnerable VMs for a pentesting lab. I keep the .vbox files on my local HDD and the .vmdk’s on an external HDD. When creating the virtual hdd for the image make sure you click the folder icon when naming the .vmdk to place it outside the default directory. For a pentesting I always go with Kali (or Backtrack if i’m feeling non-debian compliant) and when setting up the VM in virtual box (before you start it to install the iso) make sure you go to Machine -> Settings -> System -> Processor -> Check “Enable PAE/NX”.
3. Set everything up in host-only mode (machine network settings). If you get the error that no host-only adaptors exist then you must create an adapter in the main virtual box preferences. Read more here.
 4. Once you deploy two VMs you should be able to ping from machine to machine. If not, check the host-only adapter, which needs it’s own IP, an IP for the virtual DHCP server, and the assignable range. Make sure VMs are set to DHCP, you may need to reboot VMs and VirtualBox once adapter setting change. Once you have traffic flowing let the fun begin.
5. You can expand on this setup by using virtual networking with GNS3 which works really well with virtual box! Also if you are looking for vulnerable vms check out VulnHub.com